Introduction: The Power of Color Drenching
The painters have officially wrapped up, and I can honestly say: Color drenching was the best design decision we could have made.
If you were on the fence about painting your walls, ceilings, trim, and interior doors all the exact same color, let this be your sign to go for it. Because we used different sheens (flat for the ceilings, eggshell for the walls, and semi-gloss for the trim and doors), everything catches the light just a little bit differently. It creates this subtle, seamless, incredibly cozy vibe that makes the whole house feel like a warm hug. I am completely in love with it!
The Fireplace Wall Dilemma
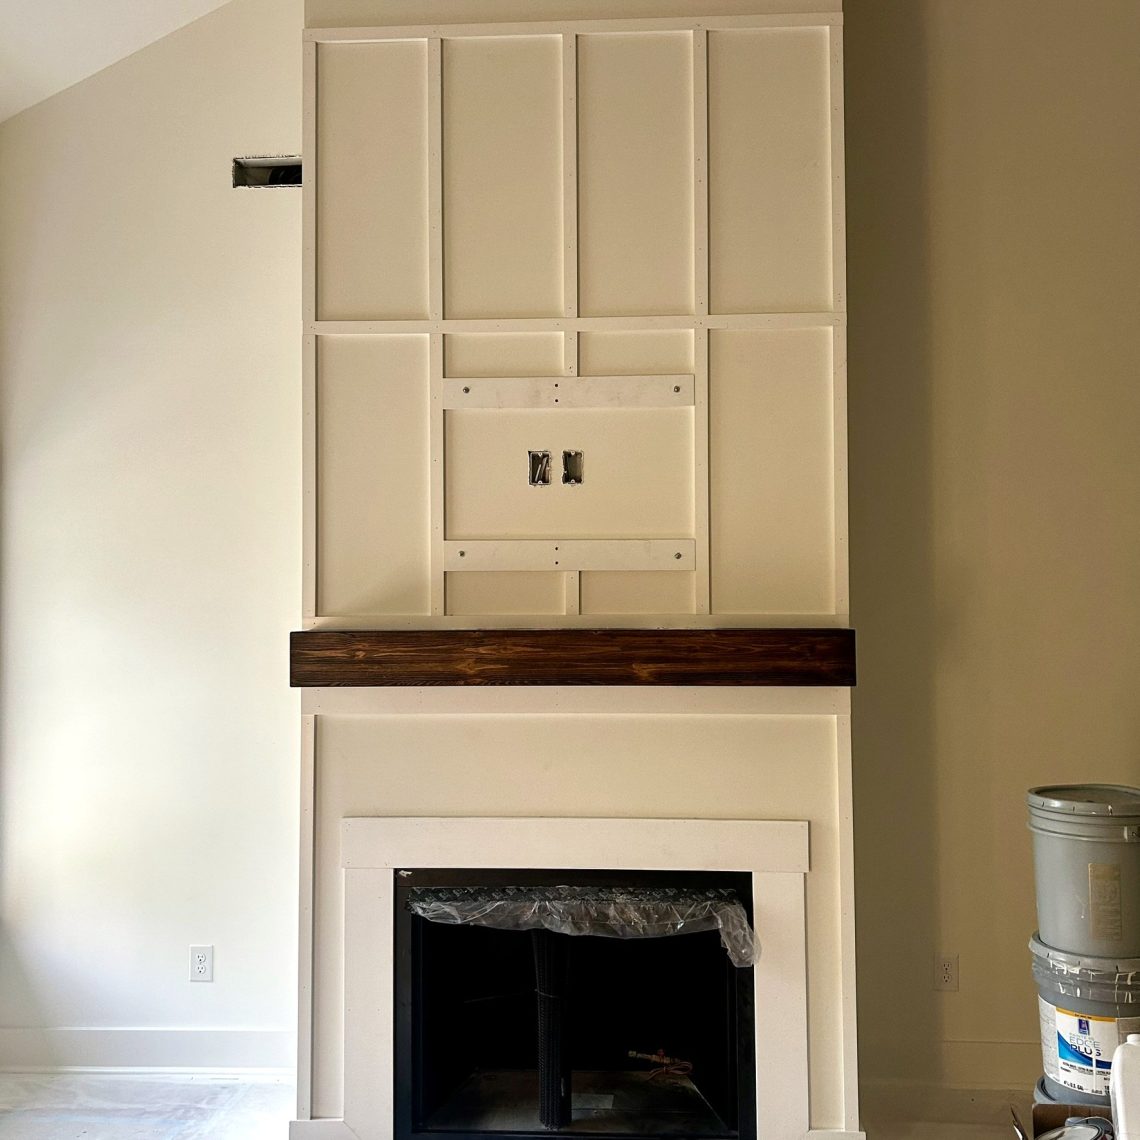
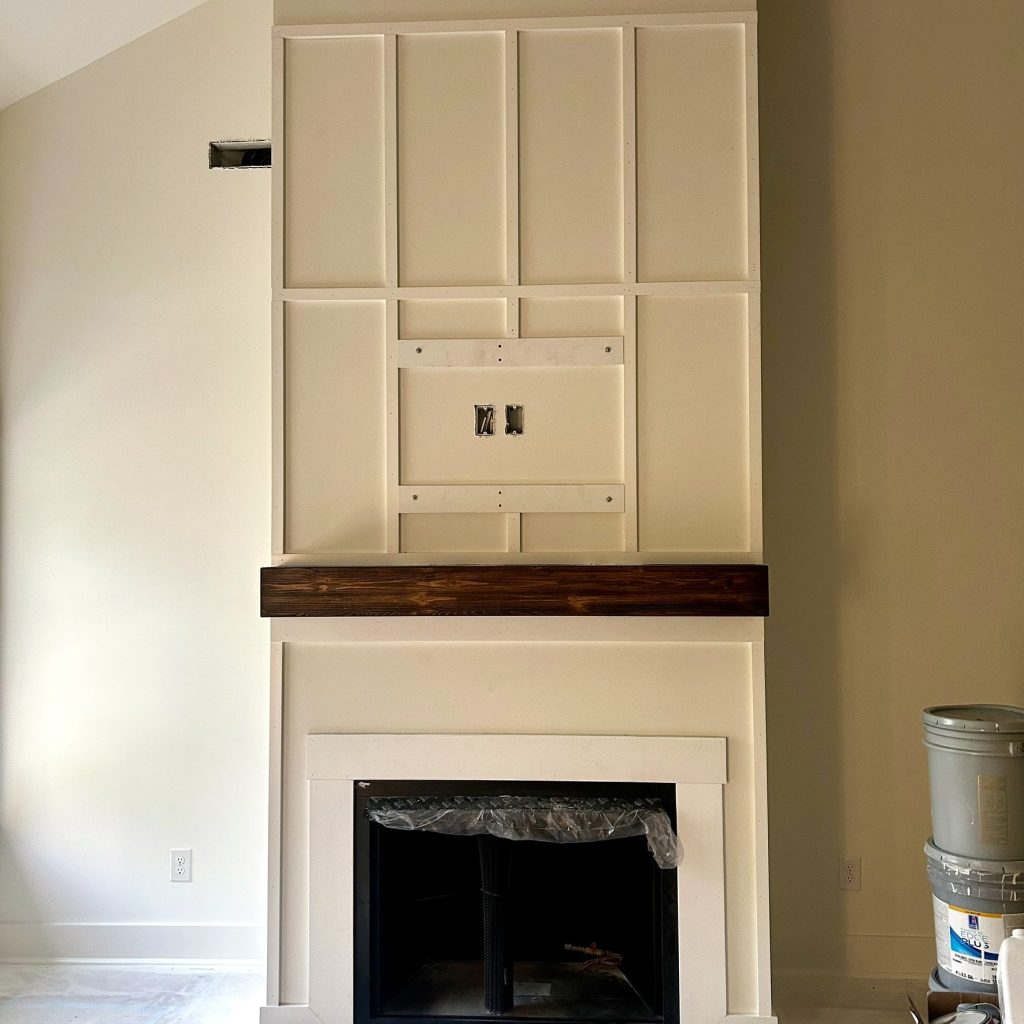
With the paint looking so fresh, it brought us to our next big project: the wall over our ventless gas fireplace. With a soaring 20-foot peak at the ceiling, that blank wall needed something special to carry the eye upward.
Originally, we looked at stone or tile, but when we saw the price tag, we quickly realized it wasn’t in the budget. So, Larry and I did some brainstorming. Instead of masonry, we decided to create a custom trim pattern and add a statement mantel—and because our painter is a rockstar, he told us that if we got the trim up before his final coat, he’d caulk, fill the nail holes, and spray it right along with the rest of the room. Talk about a massive win!
The Hollow Beam Mantel Solution
We had originally hunted for a heavy, authentic antique barn beam for weeks. But when we factored in the massive weight and the tricky installation costs, we decided to pivot.
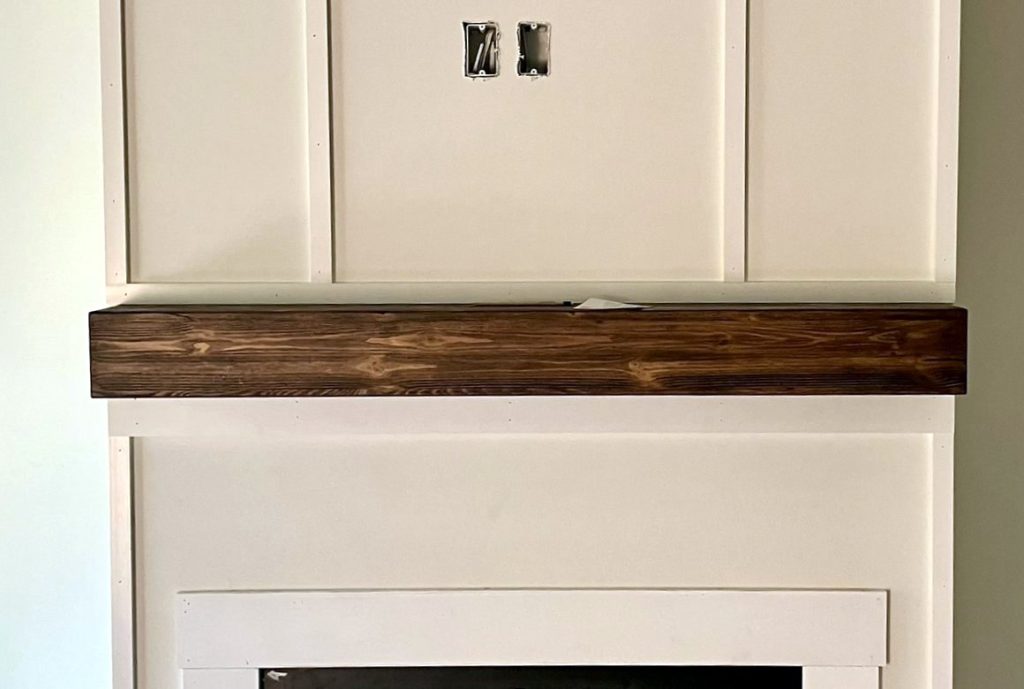
We found a gorgeous hollow faux-barn-beam mantel on Wayfair, and it was delivered to our doorstep in just a few days. It gave us that rustic, high-end look we wanted, but at a fraction of the weight and cost. It even came with its own little level to make installation a breeze. We got it mounted over the weekend, and it looks like a million bucks.
DIY Trim & Budget Savings
Next, we made a quick run to Lowe’s, picked up some PVC trim, and Larry got to work mapping out the measurements so every block and square was perfectly spaced. At the same time, our trim guys were on-site wrapping up the garage and boxing out the fireplace to match the exact same casing style as our doors and windows.
Once they finished, Larry installed our custom trim pattern in two neat rows just above and below the mantel, leaving space right in the center for our TV to be mounted.
When all was said and done, doing stone or tile could have easily cost us a few thousand dollars. By opting for PVC trim and a hollow beam, we spent just a few hundred dollars and a weekend of our time. It completely transformed that massive 20-foot wall without breaking the bank.
We can’t wait to show you the final photos once the painters spray that Alabaster paint over the trim. It is all coming together!
Shop the Build: DIY Trim & Fireplace Essentials
Tackling a accent wall or fireplace project yourself? Here are the tools and finds that made our DIY weekend a success:
A must have for installing trim quickly!

Freeman 16-Gauge 2-1/2 in. Straight Finish…
This Freeman 16-Gauge 2-1/2 in. Straight Finish Nailer is excellent for fastening 1 in…. [More]
This is the exact laser level that we’ve used for years!

Bosch 50 ft. 1.5V Self-Leveling Cross-Line…
The Bosch GLL50-20 Self-Leveling Cross-Line Laser features a 50 Ft. range and cross-lin… [More]
Affiliate Disclosure: This post contains affiliate links. As an Affiliate Associate, I earn from qualifying purchases at no additional cost to you.